For many backpackers, a steaming cup of coffee is an essential part of their morning routine. It not only offers a much-needed energy boost but also provides a moment of comfort and familiarity in the midst of an adventure. In this comprehensive guide, we will explore various methods of making coffee while backpacking, taking into account factors such as convenience, weight, and taste. By understanding the pros and cons of each method, you can make an informed decision and find the perfect solution for enjoying your favorite brew camp coffee on the trail.
However, when it comes to making camp coffee in the great outdoors, striking the right balance between convenience, weight, and taste is crucial. You want a method that’s easy to use, doesn’t weigh you down, and delivers a satisfying cup of coffee.
Factors to Consider When Choosing a Coffee Making Method
When selecting the ideal coffee-making method for your backpacking trip, it’s essential to consider various factors that can influence your overall experience. In this section, we will discuss the importance of equipment weight and size, preparation complexity and time, taste preferences and brew quality, and the environmental impact of your chosen method.

Weight and size of the equipment
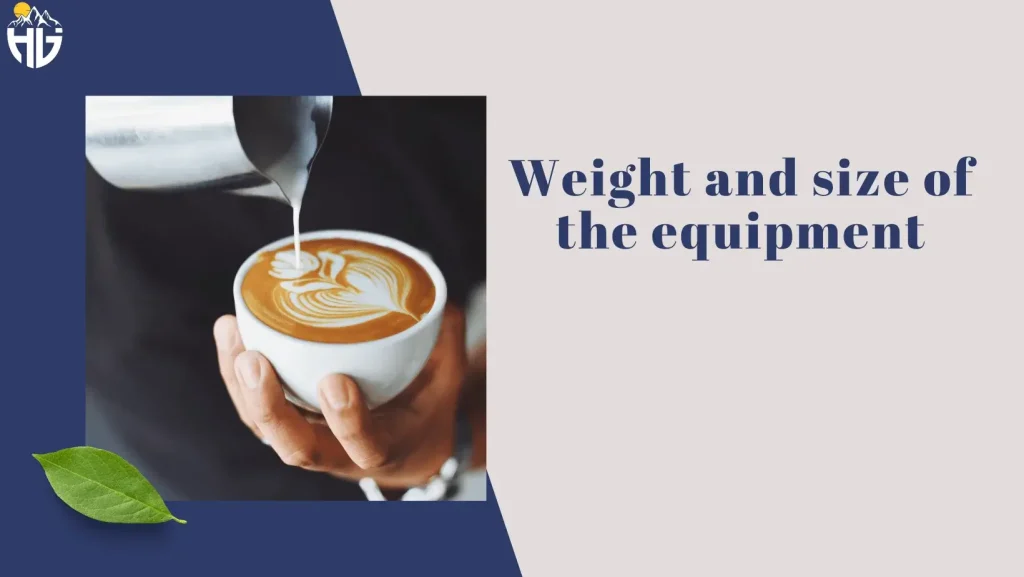
Backpacking requires carrying all your gear with you, which makes it crucial to consider the weight and size of your coffee-making equipment. Lightweight and compact options are ideal, as they take up less space in your backpack and minimize the burden on your shoulders. When comparing different brewing methods, be sure to factor in the weight of any additional accessories, such as filters, coffee grinder, or cups.
Complexity and time required for preparation

The time and effort required to prepare your hot coffee can vary significantly depending on the brewing method. Some techniques, such as instant coffee, are quick and straightforward, while others, like using a Moka pot, may require more attention and patience.
Consider how much time you’re willing to spend on camping coffee preparation and whether you’re comfortable with more complex brewing coffee processes. Keep in mind that when you’re backpacking, factors like weather conditions and available daylight can impact your ability to dedicate time to coffee making.

Taste preferences and quality of the Brew Coffee
Everyone has unique preferences when it comes to the taste and quality of their camp coffee. Some backpackers prioritize convenience over flavor, while others are willing to put in extra effort for a superior cup.
It’s essential to be honest with yourself about your taste preferences and choose a brewing coffee method that aligns with your expectations. As you read through the various methods discussed in this guide, think about the flavor profiles and strengths that appeal to you most.
Environmental impact and waste

Being mindful of the environmental impact of your camp coffee-making method is an important aspect of responsible backpacking. Consider the waste generated by different brewing techniques, such as single-use filters, plastic packaging, or disposable cups.
Opt for methods that minimize waste or allow for easy, eco-friendly disposal. Additionally, look for opportunities to incorporate sustainable and Leave No Trace practices into your camp coffee routine, which we will discuss further in a later section.
How to Make Coffee While Backpacking?
Instant Coffee

It is a popular choice among backpackers due to its convenience, lightweight nature, and minimal preparation requirements.
How to Make Instant Coffee while Backpacking
- Boil water: Heat water using your backpacking stove or another heat source until it reaches a boiling point. The ideal water temperature for making it is between 195-205°F (90-96°C).
- Measure instant coffee: Follow the recommended coffee-to-water ratio provided on the instant camp coffee packaging. Generally, one teaspoon of instant coffee is suitable for an 8 oz. cup of water.
- Combine coffee and water: Pour the hot water over the powder in your cup or mug.
- Stir and dissolve: Stir the mixture until the instant camp coffee is completely dissolved.
- Adjust to taste: If desired, add sugar, creamer, or milk to taste.
- Enjoy: Sip and savor your instant coffee.
Pros
Lightweight and compact: Camp coffee is freeze-dried or spray-dried, making it light and easy to pack in your backpack.
Quick and easy preparation: Instant coffee requires minimal effort and no additional equipment for making coffee.
Minimal cleanup: With no brewing equipment, filters, or ground coffee involved, cleanup is quick and straightforward.
Long shelf life: Instant coffee has a long shelf life, making it a reliable option for extended trips or emergency situations.
Cons
Taste and quality: While instant coffee has improved over the years, it generally falls short when compared to freshly brewed coffee in terms of taste and aroma.
Limited customization: Unlike other brewing methods, you have limited control over the strength and flavor profile of your coffee when using instant coffee.
Potential environmental impact: Some instant coffee brands use single-use plastic packaging, which contributes to waste. Look for brands with eco-friendly packaging options to minimize your environmental footprint.
Single-Serve Pour-Over

Single-serve pour-over coffee is a convenient and lightweight option for backpackers who prefer a freshly brewed cup of coffee on the trail.
How to make single-serve pour-over coffee while Backpacking
- Boil water: Heat water using your backpacking stove or another heat source until it reaches a boiling point. The ideal water temperature for pour-over coffee is between 195-205°F (90-96°C).
- Prepare the single-serve pour-over: Open the single-serve pour-over package and carefully remove the filter. Most single-serve pour-over coffee makers come with a pre-filled filter containing your favorite ground coffee.
- Place the filter on your cup: Unfold the filter’s support arms and place it securely on top of your coffee cup or mug.
- Wet the coffee grounds: Slowly pour a small amount of hot water over the grounds, wetting them evenly. Wait for 30 seconds to allow the coffee to “bloom” and release carbon dioxide.
- Pour the remaining water: Slowly pour the remaining hot water over the grounds in a circular motion, starting from the center and moving outward. Continue pouring until you’ve reached the desired amount of coffee.
- Dispose of the filter: Once the brewing process is complete, carefully remove the single-serve pour-over filter and dispose of it according to Leave No Trace principles.
- Enjoy Coffee: Sip and savor your freshly brewed single-serve pour-over coffee.
Pros
Lightweight and portable: Single-serve pour-over camping coffee maker is compact and easy to pack in your backpack.
Freshly brewed coffee: Unlike instant coffee, pour-over coffee is freshly brewed, offering a superior taste and aroma.
Minimal equipment required: No need for additional brewing equipment, as the coffee grounds are pre-measured and contained within the filter.
Easy cleanup: Simply dispose of the used filter according to Leave No Trace principles.
Cons
Limited customization: Pre-filled single-serve pour-over filters offer limited control over camp coffee strength and flavor profile.
Waste generation: Single-use filters and packaging can generate waste. However, some brands offer eco-friendly and compostable options.
Slightly longer preparation time: Pour-over coffee requires more time and attention than instant coffee, but it’s still relatively quick and easy.
How to use a single-serve pour-over
- Follow the steps mentioned above for making single-serve pour-over coffee.
- Make sure to position the filter securely on your cup or mug to avoid spills and uneven brewing.
- Pour the water slowly and evenly to ensure proper extraction and a consistent flavor.
- Practice Leave No Trace principles when disposing of the used filter and packaging.
Portable French Press

A portable French press is an excellent option for backpackers who prefer a rich and full-bodied cup of hot coffee while on the trail.
How to Make Fresh Coffee with a Portable French Press While Hiking
- Boiling water: Heat water using your backpacking stove or another heat source until it reaches a boiling point. The ideal water temperature for French press coffee is between 195-205°F (90-96°C).
- Measure coffee grounds: Use a medium to coarse grind and follow a coffee-to-water ratio of approximately 1:15. For example, use 20 grams of ground coffee for a 12 oz. (300 ml) French press.
- Combine coffee and water: Add the camp coffee to the portable French press, then pour the hot water over the grounds. Make sure to wet the grounds evenly.
- Stir and steep: Gently stir the grounds and water mixture to ensure even extraction. Place the lid on the French press and let the coffee steep for 4 minutes.
- Press and pour: Slowly press down the plunger to separate the grounds from the liquid. Pour it into your cup and Drink coffee.
Pros
Rich and full-bodied flavor: French press coffee offers a bold and robust flavor, with a more substantial mouthfeel compared to other brewing methods.
Simple preparation: The French press method is relatively straightforward and doesn’t require additional equipment such as filters.
Customizable: You can adjust the water ratio, grind size, and steeping time to suit your taste preferences, and make a fresh coffee.
Versatile: Portable French presses can often double as a travel mug or be used to steep tea and other beverages.
Cons
Heavier and bulkier: Portable French presses are generally heavier and bulkier than other backpacking coffee-making options.
Cleanup: Cleaning a portable French press can be more challenging than other methods, as you need to remove the grounds from the device.
Potential for over-extraction: If the coffee grounds are left in contact with the water for too long, the coffee may become over-extracted and bitter.
8 Tips On Ideal Diet For Hiking Training
Choosing the right portable French press
Size and capacity: Consider the size and capacity of the French press based on your personal coffee consumption and the number of people you’ll be brewing for.
Material: Look for a French press made from durable materials such as stainless steel or BPA-free plastic to ensure it withstands the demands of backpacking.
Insulation: Some portable French presses feature double-wall insulation, which helps keep your coffee hot for longer periods.
Ease of cleaning: Choose a French press with a design that allows for easy disassembly and cleaning, especially when dealing with limited water resources on the trail.
AeroPress

The AeroPress is a versatile and lightweight coffee-making device that has gained popularity among backpackers for its durability, ease of use, and the quality of coffee it produces.
How to make coffee with an AeroPress while Backpacking
- Boil water: Heat water using your backpacking stove or another heat source until it reaches a boiling point. The ideal water temperature for AeroPress coffee is between 185-205°F (85-96°C).
- Assemble the AeroPress: Place a filter in the filter cap and attach it to the bottom of the AeroPress chamber.
- Measure coffee grounds: Use a fine to medium grind and follow a coffee-to-water ratio of approximately 1:15. For example, use 17 grams of coffee grounds for an 8 oz. (240 ml) cup.
- Add coffee and water: Place the AeroPress on top of your cup or mug. Add the coffee grounds to the AeroPress chamber, then pour the hot water over the grounds. Make sure to wet the grounds evenly.
- Stir and steep: Gently stir the coffee grounds and water mixture to ensure even extraction. Let the coffee steep for about 1 minute.
- Press and enjoy: Insert the plunger into the AeroPress chamber and press down slowly and steadily until you reach the bottom. Your coffee is now ready to drink.
Pros
Lightweight and compact: The AeroPress is made from lightweight materials, making it a suitable option for backpacking.
Fast and efficient brewing: The AeroPress brewing process takes only a few minutes, allowing you to enjoy a freshly brewed cup of coffee quickly.
Customizable: You can adjust the coffee-to-water ratio, grind size, and steeping time to suit your taste preferences.
Versatile: The AeroPress can be used to make both espresso-style and American-style coffee, as well as cold brew.
Cons
Additional accessories: The AeroPress requires filters, which need to be packed and disposed of responsibly.
Cleanup: While cleaning the AeroPress is relatively simple, it does require some water, which can be a consideration in water-scarce environments.
Moka Pot

The Moka pot is one of the best camp coffee makers that produces a rich and flavorful coffee, similar in strength to espresso. While it’s not one of the lightest or most compact ways to make coffee, some backpackers prefer it for the unique and great coffee it produces.
How to make coffee with a Moka pot while Backpacking
- Grind coffee: Use a medium-fine grind for Moka pot coffee. You’ll need enough coffee to fill the filter basket, which varies depending on the size of your Moka pot.
- Fill the water chamber: Fill the bottom chamber of the Moka pot with cold water up to the pressure release valve or the indicated fill line.
- Add coffee grounds: Fill the filter basket with coffee grounds, leveling them off without tamping or compressing them. Place the filter basket into the bottom chamber.
- Assemble the Moka pot: Screw the top chamber onto the bottom chamber, ensuring a tight seal.
- Heat the Moka pot: Place the Moka pot on your backpacking stove or another heat source. Use low to medium heat, and keep the lid open to monitor the brewing process.
- Watch for coffee: As the water heats up, it will create pressure that forces the water through the coffee grounds and into the top chamber. The process is complete when the coffee stops flowing, and you hear a gurgling sound.
- Remove from heat and serve: Remove the Moka pot from the heat source and pour the coffee into your cup. Enjoy!
Pros
Rich and flavorful coffee: The Moka pot produces a full-bodied and strong coffee, similar to espresso, which some backpackers find appealing.
Durable and long-lasting: Moka pots are typically made from aluminum or stainless steel, making them a sturdy and durable option.
No paper filter: The Moka pot uses a metal filter basket, eliminating the need for disposable paper filters.
Cons
Heavier and bulkier: Moka pots are generally heavier and bulkier than other backpacking coffee-making options, making them less suitable for ultralight backpackers.
Longer preparation time: The Moka pot brewing process takes longer than some other methods, such as AeroPress or instant coffee.
Cleanup: Cleaning a Moka pot requires disassembling the device and rinsing out the various components, which can be a consideration in water-scarce environments.
Conclusion
In summary, we’ve explored various coffee-making methods suitable for backpacking, each with its own unique advantages. Instant coffee offers the quickest and most lightweight option, while single-serve pour-over and AeroPress provide freshly brewed coffee with minimal equipment. The portable French press delivers a rich and full-bodied cup, and the Moka pot produces a strong, espresso-like good coffee.
We encourage you to experiment with different coffee-making techniques to find the perfect method that caters to your taste preferences and backpacking needs. By doing so, you can ensure that you’ll always have a satisfying cup of coffee to energize and invigorate you on your outdoor adventures.
Frequently Asked Questions
How To Make a Camp Coffee?
To make camp coffee, simply boil water on your camp stove, add coffee grounds directly into the pot, and let it steep for 4-5 minutes. Then, gently swirl the pot to help the grounds settle and carefully pour the brewed coffee into your cup, leaving the grounds behind. Enjoy a rustic, satisfying cup.

How To Make Cowboy Coffee?
To make cowboy coffee, boil water in a pot over a campfire or stove. Remove from heat, add freshly ground coffee (1:16 coffee-to-water ratio), and let steep for 4 minutes. Stir, then wait 30 seconds for the grounds to settle. Carefully pour coffee into your cup, leaving grounds behind. Enjoy!

Can we make coffee with Used Coffee Grounds while hiking?
Reusing coffee grounds while hiking is possible but not ideal, as most flavor has been extracted. To make coffee with used grounds, use twice the amount of grounds, add hot water, and steep longer than usual to extract remaining flavor. Expect a weaker, less flavorful cup compared to fresh grounds.


Fahad Sajjad
Founder & CEO
at
Meraki Writes
Meraki Writes is a distinguished content marketing agency committed to
delivering exceptional content for businesses and online platforms.
With a dedicated team of skilled writers and editors, Meraki Writes
consistently produces high-quality articles, ensuring client satisfaction
and audience engagement. The same team of professionals is responsible
for crafting each insightful and well-researched article on Hike Genius,
a reputable hiking niche website.
Recent Articles
How to Make Coffee While Backpacking8 Tips on Ideal Diet for Hiking TrainingHow Much Should a Sleeping Bag Weigh for BackpackingWhat Does NOBO Mean in HikingHow Much Do Hiking Boots Weigh?